Wednesday, May 23, 2012

Easy Caramel Sauce


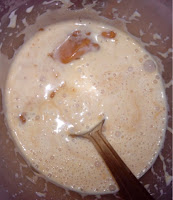
This caramel sauce was gorgeous! And SO easy! Its so easy to sit there with a spoon and eat the entire jar! I've started to add a spoonful to porridge with bananas.

Recipe:
- Bag of soft toffees (I used Cadbury's eclairs)
- Double cream (The amount you use depends on how many toffees you have) 

1. Remove the wrappers and empty them into a jug.


2. Cover the toffees in cream.


3. Melt them together in the microwave for one minute, give them a mix, then heat it for 30 seconds bursts, stirring in between, until it is smooth.


4. Pour into a glass jar and leave to cool.


Zoe x

Thursday, May 17, 2012

Sausage Meat Lasagne


It would be really easy to sit there and eat all of the lasagne without sharing it with anyone else. Its THAT good. This was the first meal that my boyfriend had cooked me, I had never had it before and had no clue what it would turn out like! However, his food has never disappointed me and this was amazing :)

Sausagemeat or sausage meat? I'm not sure which one is right, I think sausagemeat looks right, but my spell checker doesn't agree!

Recipe:
- 2 tbsp olive oil
- 350g sausagemeat
- 1 onion, chopped
- 1/2 tsp garlic (i use garlic from a squeezy tube, otherwise use about 2 cloves of garlic, finely chopped)
- 250g mushrooms, quartered
- 1/2 bag spinach (you can use more if you want)
- 300ml crème fraiche

- 1 can chopped tomatoes (you might need 2 cans depending on how big your lasagne dish is)
- 2 tbsp tomato purèe
- 1/2 tsp oregano
- Salt and pepper
- Lasagne sheets
- Grated cheese (I use mature cheddar cheese)

1. Preheat the oven to 200 degrees.
2. Soak the lasagne sheets in a big bowl of water.
3. Add 1 tbsp of oil to a frying pan, add the minced turkey and brown.
4. When the turkey is almost completely brown, add the onion and garlic. Cook for 3-5 minutes.
5. Add the mushrooms, then the spinach.
6. When the spinach has wilted down, add the crème fraiche and stir together.


7. In a separate pan, heat the other tablespoon of olive oil and the garlic.
8. Add the chopped tomatoes, tomato purèe, herbs and seasoning. 
9. You now want to start layering it all up. The first layer is the turkey, then pasta sheets, then a thin layer of the tomato ragu. Repeat this order until you have 2 or 3 layers, obviously it depends on how thick your layers are and how big your dish is.
10. Top with grated cheese and put it in the oven for 20-30 minutes

Cover with cheese!

Ta da!
 A healthier variation to this lasagne is to replace the sausage meat with minced turkey. Recipe is here.

Zoe x


Thursday, May 10, 2012

Vodka Gummy Bears

You are probably thinking 'what?!?!' right now....I know I certainly was when my friend Dan (go look at his blog, the Shrimpdude) introduced me to these!
Vodka gummy bears?
Its literally what it says on the packet...Gummy bears soaked in vodka.
But I soaked mine in a peach schnapps and vodka concoction, in hope that the peach schnapps would make it taste nicer. Ever made vodka jelly shots? Strawberry and raspberry flavours taste amazing with peach schnapps (with or without the vodka). I'm sure orange would too.

The clear gummy bear was after it had been soaking in the liquid for less than 24 hours, and the green one is a normal gummy bear that hasn't had anything done to it. You can obviously see that there is a massive change!

So how do we get this gummy goodness?

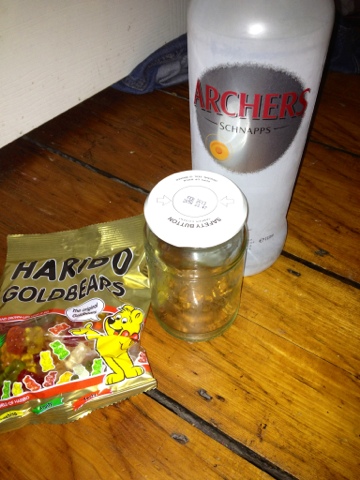
You will need:
- Gummy bears (or any other gummy sweets)
- Vodka (...and peach schnapps)
- A jar. Or a glass bowl. Nothing plastic! Apparently it makes the sweets taste weird.


Tip the gummy bears into the jar. Leave enough room for the liquid, and for the sweets to swell up.


Then add the alcohol, covering the sweets. 
It might turn a bit cloudy, but that is nothing to worry about.


Lid on, and done. Leave it for a few days to soak up the alcohol. I topped mine up on the second or third day because it didn't seem like there was much left. Its now 2 days after that and there is no liquid again!! Gummy bears must be really thirsty! And drunk....
They went from this...
...To this!

Okay, so one of those photos was edited on Instagram and is more zoomed in than the other, but you can still see the edges of the jar and how much they have swollen up!!

Zoe x

Monday, May 7, 2012

Lemon Cheesecake with Berries

These cheesecakes are really yummy and easy! Plus you can have fun deciding how to layer and decorate them!

Recipe:
For the base:
- 8 digestive biscuits
- 90g caster sugar

For the cheesecake:
- 400g cream cheese
- 90g icing sugar
- Zest of 1/2 a lemon
- Juice of 1/2 a lemon
- 600ml double cream

For the topping:
- Mixed berries (frozen or fresh)
- Caster sugar
- Creme de cassis (blackberry liqueur)
- Lemon juice

1. Break up the digestive biscuits. I put them in a sandwich bag and bash them with a rolling pin.
2. Heat the sugar in a pan over a medium heat. Do not stir it with a spoon or any other utensil, just swirl it around in the pan. 

3. When it has all caramelised, like in the picture above, add the broken up biscuits and stir, like the picture below.


4. Leave this mixture to cool and harden on a plate in the fridge. When you take them out of the fridge to serve them, you might need to break them up again with a rolling pin!


5. Whip the cream, until it is thick and can hold a soft peak when you lift the whisk out.
6. In a separate bowl, mix the cream cheese, icing sugar, lemon zest and lemon juice together. 
7. Mix a large spoonful of the whipped cream into the cream cheese mixture, then carefully mix the rest of the rest of the cream. You want to do it carefully so that you don't knock lots of air out of your whipped cream.


The first way that I decorated them was with fresh berries (or frozen berries) and a berry sauce. Heat some lemon juice, creme de cassis and caster sugar in a saucepan, bring it to the boil, then turn the heat down and thicken the sauce up for a few minutes, then leave it to cool. Remember that the sauce will thicken up even more when it has cooled. The berries that I used were frozen, so I defrosted them in the microwave and left them to cool.
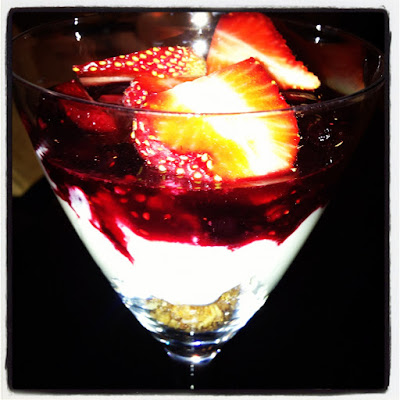
To layer it up, spoon caramelised biscuits into the bottom of whatever you are serving it in, I chose margarita glasses, then put the cream cheese mixture on top, followed by the berries, drizzle with some of the sauce and top with more of the caramelised biscuit crumbs.


Or the second way that I decorated them was with a berry compote. Put some frozen mixed berries into a saucepan with some sugar, lemon juice and creme de cassis, heat them up until the berries go from this....

...to this! The berries should have broken down and the sauce should have thickened up.

I spooned the caramelised biscuit crumbs into the bottom of the glass, then the cream cheese mixture, then the berry compote. I topped it with a few slices of fresh strawberries.


Zoe x


Saturday, May 5, 2012

Swirly Cupcakes


I have got SO many compliments about these cakes, because they are very pretty and they taste really good!

 
I've started to whisk the batter and the icing with an electric whisk, which makes them both really light and airy.
For these cakes, I used the recipe from my Vanilla Cupcakes post and the icing from my How to make the perfect butter icing.
The icing is the same recipe/proportions, but there is more!

Recipe:
For the cake:
- 125g butter
- 125 g caster sugar
- 2 eggs
- 1 tsp vanilla extract
- 150g plain flour
- 1 tsp baking powder
- Food colouring of your choice

For the icing:
- 150g butter
- 250g icing sugar
- 1 tsp vanilla extract
- Food colouring of your choice

1. Preheat the oven to 180 degrees.
2. Cream the butter until it is pale and fluffy. I have started doing this with an electric whisk, because it goes very pale and very fluffy very quickly! You can do this manually, and see how I do it here. Add the sugar and whisk it again.
3. Add the vanilla extract and one egg, mix well, then add the other egg and mix again.
4. Sift the flour and baking powder into the bowl, then gently mix them into the batter. DO NOT turn the whisk on!! The flour will fly everywhere! Either mix it with a spoon then whisk it, or keep the whisk turned off and mix it. *
5. Spoon the mixture into 12 cupcake cases, and bake in the oven for 10-12 minutes.
6. When the cakes, have finished baking, take them out of the oven and leave them to cool.

7. For the icing, whisk the butter until it is light and fluffy.
8. Gradually mix the icing sugar into the butter (don't turn the electric whisk on!!), then add the vanilla extract.
9. When the cakes are completely cooled, either spread the icing on or pipe it on to the cupcakes.

* For the blue and the pink cupcakes, at stage 4 add a little bit of food colouring (if its a paste, then 1/8-1/4 tsp, if its liquid, 1-2 drops), and half mix it in, so that it creates a swirled and marbled effect.

For the two-toned pink cupcakes:
- When you have made the icing, add half of the icing to a different bowl. 
- Add food colouring to one half (or do different colours on each half).
- Spoon the icing into a piping bag, but put the plain icing on one side, and the coloured icing on the other side. Then pipe the icing as usual.


For the blue cupcakes:
- Make the icing as usual, you can choose if you want to colour the icing or not. I coloured mine slightly, to make the icing pale blue.
- This is the tricky part! You need a paste food colouring here, not a liquid one. You will need to dip a toothpick into the colouring, and draw a straight line up each side of the piping bag. Its hard to get your hand far enough into the bag and not get it covered in colouring! I failed miserable at this and I have very blue hands!
- Then put the icing into the piping bag as usual and ice away! You probably want to pipe a bit of the icing back into the bowl, until the darker lines show up.


How cute is this box? My friend Vicky got it for me from Poundland :)
Thank you Vicky!

Zoe x

Related Posts Plugin for WordPress, Blogger...