Showing posts with label chocolate. Show all posts

Tuesday, December 31, 2013

Triple Chocolate Cupcakes

Happy New Year's Eve!


I don't normally like chocolate cake, and I rarely try to make chocolate cupcakes, because they are dry and flavourless. Luckily, this one is moist and actually tastes of chocolate! I also used it over Christmas to make Christmas tree cupcakes (pictured at the end).

These are dark chocolate cupcakes, stuffed with a Lindt Lindor chocolate truffle, covered in icing that tastes like a chocolate truffle, and topped with glitter.


This was supposed to make 12 cupcakes, but ended up making 16!
It is easier to make the icing first, as it needs to cool.

Icing:
-150g chocolate (I used a mix of dark and milk)
- 160g butter
- 3-4 tbsp cream

1. Melt the butter and chocolate together in the microwave. Mix together and leave in the fridge or freezer to cool. (Make your cupcakes while its cooling!)
2. When it has cooled and is almost set, remove it from the fridge or freezer.
3. Use an electric whisk and whip the chocolate mixture. It should turn lighter in seconds.
4. Add the cream, then whip again. When everything is incorporated, stop whipping it, and smother it over cupcakes!
I topped my cakes with gold shimmer crystals and edible glitter.


Cupcakes:
-200g sugar
-200g self-raising flour
-75g cocoa powder
-1/2tsp salt
-1 tsp vanilla extract/2 tsp vanilla essence
-1 egg
-50ml vegetable oil
-100ml milk
-200ml hot water
-6 or 12 Lindt truffles (I cut mine in half, so only used 6)

1. Preheat the oven to 180 degrees.
2.  Add everything but the Lindt truffles and the hot water to a mixing bowl.
3. When everything is mixed together, add the hot water. The mixture is quite runny.
4. Fill cupcake cases 2/3 to 3/4 full, then bake in the oven for 20 minutes.
5. When the cupcakes have cooled, push a Lindt truffle into the cake, then cover with icing!


This recipe was originally used for making Christmas tree cupcakes, they turned out pretty well!
I used butter icing on them, rather than chocolate icing.

Sunday, November 10, 2013

No Bake White Chocolate Cheesecake

This is a really delicious white chocolate cheesecake, that we were serving at the pub I work in.
It was only meant to be on for a week, but stayed on for about 6 weeks.

This cheesecake is very rich, but light and fluffy.


Biscuit base
- 300g biscuits (I used half Digestive, half chocolate chip cookies)
- 80g butter, melted

Filling
- 375g double cream
- 750g cream cheese
- vanilla extract/flavouring (not essential)
- 500g white chocolate (Plus extra to drizzle on top!)
(I know it gets expensive, but I would recommend using a more upmarket, nice tasting white chocolate!)

1. Break the biscuits into crumbs. I did this in a food processor, but you can put them in a ziploc bag and bash them with a rolling pin.
2. Add the melted butter, and mix.
3. Squash the breadcrumbs into a cake tin until it is very compact. Put it in the fridge to cool.
4. Break the white chocolate up and melt it in the microwave (in small bursts) or over a double boiler. When it has melted, leave it to cool on the counter.
5. Whip the double cream in a large bowl.
6. Mix the cream cheese and vanilla (1tsp-1tbsp depending on how you like the taste) into the cream.
7. Add a large spoonful of the cream cheese mixture into the cooled but melted white chocolate, give it a mix, then add all of the white chocolate into the cream cheese.
8. When it is all evenly mixed, pour the filling over the biscuit base and smooth it over at the top.
9. Leave to cool in the fridge for about an hour, then melt the extra white chocolate and drizzle it over the top. Put back in the fridge and cool for a further 2 hours. This cheesecake needs to be cooled for 3 hours in total.

Enjoy!

Tuesday, January 22, 2013

Paris and Christmas 2012

My Christmas holiday was rather eventful. To start it off, I went to Paris for 4 days, then we lost our blind cat for 10 days (luckily someone found him on Boxing Day!), I started my first job in a pub, and there was the usual busyness during the Christmas and New Year period.

Chocolate Eiffel Tower, in a chocolate shop in Montmatre

Paris was definitely a good idea! I had been dying to go for years, and my boyfriend's 21st birthday was the perfect excuse! Even if his birthday was in September!
Seeing as this is a food blog, lets start with the food!


Pommes d'Amour
I loved the Christmas market that lined the Champs-Élysées. Even more, I loved the food that they served on those stalls! It was expensive, but they served some nice things. Most stalls sold 'vin chaud' (mulled wine) and some even sold mulled cider, however we had an alcohol free holiday so didn't try any.
In French, a candy apple is called Pomme d'Amour, which literally translates to 'apples of love'. Isn't that cute?
They weren't the best thing though! 

Macarons
These were the best! Macarons! 
I knew what was in a macaron, the main ingredients are egg whites, sugar and ground almonds. I don't like almonds, especially almond flavoured things, so didn't think I would like these. However, on our last night we were walking through the Champs-Élysées Christmas market and saw a stall with many different flavour macarons, and I said 'we are in France so we had better try their delicacy while we are here!' and bought two raspberry macarons. We had bought some churros just before, and decided not to eat all of them, so that we could get rid of the taste of the horrible almond macarons when we had tried them. No need for the churros though, the macarons were heaven! Slightly crispy on the outside, soft on the inside with a lovely raspberry jam. We felt really, really stupid after this!! All of this time being among these delicious treats and we had said no every time? Idiots! Those churros were pretty horrible after eating the little bites of heaven. We went back to the stall a few minutes later and bought 10 more! We had lemon, caramel, violet and raspberry. I can't decide which was my favourite, violet or raspberry!
Guess what I want to learn to make now?


On our first full day in Paris, we didn't know where a good place for lunch was, so we walked into a bakery to see what they had. We were still choosing when the staff were ready to serve us, which put us under pressure so we just pointed at what looked good and that was that. I had no clue what I had ordered, and I still don't know now! It was lovely though! I want to say that it was like salted, dried beef? An equivalent of Parma ham, but this was not pork. It came with cheese, I assume it was Parmesan, and lettuce in a baguette, however the baguette had pieces of sweet onion throughout it.


La Durée.
Ever heard of it? I hadn't until I started reading about Paris. They are the inventors of the macaron. They celebrated their 150th anniversary this year. They are located on the Champs-Élysées. I wasn't planning on going in, but we saw it and I was dying to see what was inside! Most of the decorations were mint green and gold, their signature colours, and it all looked very fancy. Once you go in and join the queues, you know you are going to walk out with something. We walked out with a little something each, because no way was I sharing! I think my boyfriend had a chocolate éclair, and I had 'Saint-Honoré', which was a massive choux bun filled with crème patissière and dipped into molten sugar, with 3 smaller versions stuck onto the top with whipped cream. It also had some flaked nuts stuck on the side. 
I was still in the 'I won't like macarons' part of my life, so wouldn't get one to try. Silly me!


Less about the food and more about Paris? Our flight landed at 10pm, so all we did was go to the hotel via train and metro. We walked over to the Eiffel Tower, which was a 10-15 minute walk away from the hotel. We took some pictures and wondered back.
This is a link to the hotel's website and TripAdvisor page.
I haven't been given anything to promote this, it is all my own opinions. I wish I got paid to do it!

This is a collage of pictures from our first full day in Paris. We started our day with a pastry from Fournil de Carole, which was a bakery across the road from the hotel. We walked past l'École Militaire, to Notre Dame and Ile de la Cité. We then found the Louvre, where we got in for free and saw the Mona Lisa, it wasn't as good as I thought! Loads of people were crowded around trying to take pictures and the painting was tiny! There were far more impressive pieces of work in there. We then walked along Rue de Rivoli and up the Champs-Élysées, where we spent ages looking at the Christmas market and going in and out of the shops. We went up the Arc de Triomphe, which had fantastic views, especially at the time that we went! We wondered the streets of Paris back to our hotel, where we asked the receptionist for a restaurant recommendation. She told us to go to Café du Commerce, which was just around the corner on Rue du Commerce. It was a typical French bistro, good food, good atmosphere, crazy waiter running about and lots of tables! I had onion soup, duck a l'orange with dauphinoise potatoes. We couldn't fit any dessert in! 
A ceiling in the Louvre
On our third day in Paris we had to get up slightly earlier than normal as we had booked a tour to go to the top of the Eiffel Tower. We had an English speaking tour guide that told us a lot about the Eiffel Tower and Paris. We had lots of the standard Eiffel Tower pictures taken! We then walked along the Seine river to Galleries Lafayette, where spent an hour or two looking around. We played a game - Who can find the most expensive bottle of wine? My boyfriend won when he found a 55,000 Euro bottle of wine! After that we went on the metro to Montmatre, where we walked past Place d'Artistes (Artists Square), which has so many fantastic artists painting and displaying their work. We carried on walking up the hill to the Sacre Coeur church, which has panoramic views of Paris. The one thing you can't see is the Eiffel Tower! I wanted to see the Moulin Rouge in the neighbouring district of Pigalle, however we were very aware that it was getting dark, we had no mobile reception so couldn't get a map and its a red light district, so we decided not to go. We got the metro to the Champs-Élysées, where we walked up and down the Christmas market again, and discovered those delicious macarons. We decided not to go out for dinner as we were tired and went to Carrefour supermarket which was around the corner, and bought lots of cheese and a large baguette. Stereotypical French dinner without the wine? It also only worked out to be less than 12 Euros!


On our final day we did lots of walking around with our suitcases, but we had already seen most things that we had wanted to see in Paris! We did so much on the first few days. The two things I wanted to do was eat more yummy pastries and find a bridge with all of the love locks on. This bridge is near the Notre Dame, it is called Pont de l'Archéveché. It was lovely to see how many people put locks on and customised the bridge. One person even proposed with a lock and attached another lock to it saying 'Everyone, she said yes!'
We continued our day around the Ile de la Cité, walked up Rue de Rivoli to buy souvenirs and quickly went into the Louvre again before getting on a train to the airport. 
I definitely recommend going, we had a lovely time! If you need to do it on a budget, there are some easy ways to spend less money. Eating out costs more money than going to the supermarket, eating and drinking in a café costs more than getting it takeaway, the métro is far cheaper (and quicker) than a taxi, walking is cheaper than the métro, buy bottles of water from the supermarket, rather than pay over 10 Euros per person per day for breakfast, go to a local patisserie and get a croissant or something, if you are between 16 and 25 and from an EU country, the Louvre, Arc de Triomphe and many other things are free.
Including the hotel and flights, I think we spent about £500 together, for 3 nights and 4 days, which in a capital city in Europe is not that bad.


This is our Christmas tree with most of the presents under it. I had a lovely Christmas, we spent Christmas Day and Boxing Day with family. I love having a massive Christmas dinner, but had eaten a few too many appetizers so didn't manage to finish my food! However we had plenty the following days as we ate the leftovers. I had some lovely presents from everyone, clothes, chocolate, shoes and plenty of bath stuff!


My housemate got me this Sweet Shop recipe book for Christmas, how cute! I can't wait to make something out of it :)

New Years Eve was spent at my local pub, where I work. There weren't many people we knew there, so we ended up leaving early and played SingStar on PS3 for a few hours when we got home! I spent the rest of my holiday working every day, earning lots of money to buy a car and go to Italy in summer!

Zoe x

Tuesday, October 23, 2012

Raspberry, White Chocolate and Vanilla Cupcakes


These cupcakes were really nice, and very easy to do!
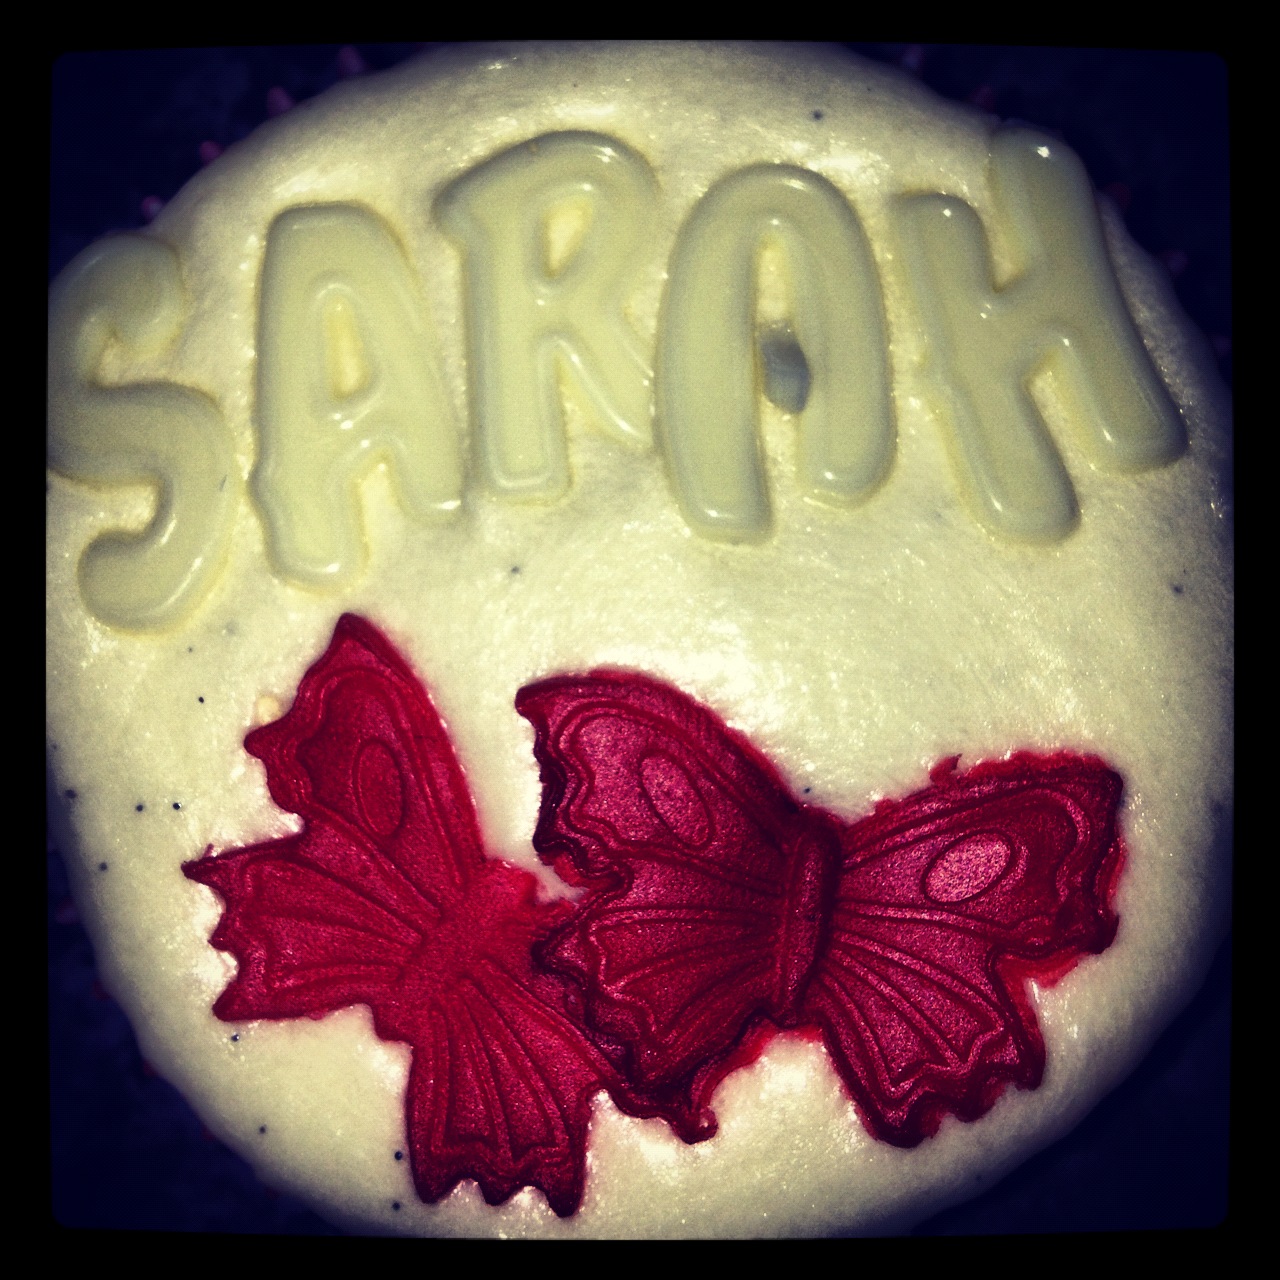
The nicest touch to these was that they had everyone's names on, in white chocolate letters :)
I also added some red butterflies for a bit of contrast, and to match the red cases that the cupcakes were in. You can get the cutters here. 

Recipe:
Cupcake
- 125g butter
- 125g caster sugar
- 2 tbsp raspberry jam
- 2 eggs
- 150g self-raising flour (or 150g all-purpose flour plus 1 tsp baking powder)
- 12 fresh raspberries

Icing
- 75g butter
- 125g icing sugar
- 1 tsp vanilla extract

1. Preheat the oven to 180 degrees. Line a muffin tray with 12 cupcake cases.
2. Cream the butter for as long as you can, meaning mix it with a fork or a whisk, until it is pale and fluffy.
3. Add the sugar, mix. Then add the raspberry jam and mix
4. Beat in the eggs one at a time.
5. Sift in the flour in and mix again.
6. Half fill the cupcake cases, then put a raspberry into the middle of each case, then pour more cupcake mix over the raspberries until the cases are about 2/3 - 3/4 full.
7. Bake in the oven for 12-15 minutes.
8. While the cakes are cooling, start to make the icing. Cream the butter until it is pale and fluffy. 
9. Carefully stir in the icing sugar and vanilla extract. 
10. When your cakes are cooled, decorate them with the icing, either piping it on, using a palate knife or a regular knife! I then added the names and the butterflies.


Zoe x


Thursday, July 26, 2012

Chocolate and Pear Cake


There are days when you need something sweet, and we thought this was perfect when we didn't have much in the house. This mainly uses products that you will have in your cupboard and fridge.

Ingredients:
- 2 cans pear halves in juice
- 190g plain flour
- 40g cocoa powder
- 190g caster sugar
- 225g butter, plus extra for greasing
- 1 1/2 tsp baking powder
- 1/2 tsp bicarbonate of soda
- 3 eggs
- 3 teaspoons vanilla extract

Recipe:

1. Heat the oven to 200 degrees.
2. Drain the cans of pears and lay them, flat side down, on the bottom of the dish.


3. Put all of the ingredients into a bowl.


4. Mix together! 
This is honestly one of the most amazing tasting chocolate cake batters ever!!


5. Pour the chocolate batter over the pears and spread it out, its okay if some of the pear is poking out! 6. Bake in the oven for 25 minutes, then leave to cool.
7. Serve with ice cream, or a chocolate sauce! It would be great with my chocolate peanut sauce (do pears and peanuts go? Only one way to find out!)

Let me know how it turns out of you try it, and if you do, send a photo on twitter or facebook!

Zoe x

Tuesday, July 3, 2012

Chocolate Brownie Cupcakes with Caramel Sauce


I decided to make these for my housemate's 20th birthday, as my other housemate had made cupcakes for him. These definitely went down a treat and everyone loved them, especially when they found a chunk of chocolate in them!


- 160g of butter
- 500g caster sugar
- 4 eggs
- 1 tsp vanilla extract
- 125g self-raising flour
- 175g cocoa powder
- Bar of chocolate or chocolate chips (optional)

1. Preheat the oven to 180 degrees. Line a muffin tray with cupcake liners.
2. Melt the butter in the microwave, in short 30 second bursts (you don't want it to burn!)
3. Add the sugar, the eggs and vanilla extract, then whisk.
4. Sift the flour and cocoa powder in and mix.
5. Break up the bar of chocolate. I like to break it into squares, then put them a sandwich bag and whack them with a rolling pin until they are in little pieces. Then mix them into the brownie batter.
6. Spoon the batter into the cupcake liners, so that they are 2/3 full.
7. Cook them in the oven for 20-25 minutes. You want the insides to be all fudgey and the outside to be crispy.

When they are done in the oven, leave them to cool and then top them with my easy caramel sauce.
You could then grate some chocolate over them as a nice finishing touch!


Zoe x

Sunday, June 10, 2012

More Cupcake Designs

A few snaps of cupcakes that I have made!

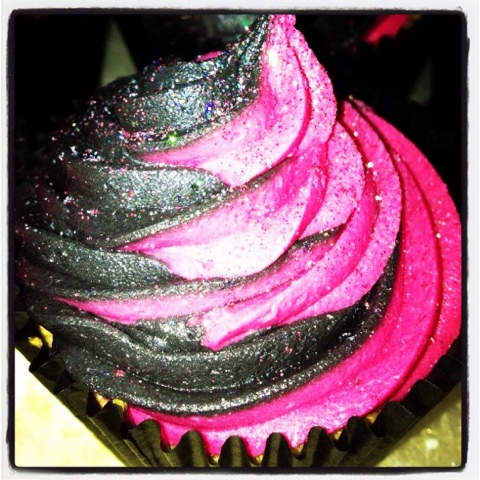
Vanilla cupcakes with pink and black two-toned butter icing and glitter.

Chocolate cupcakes with chocolate butter icing and chocolate hearts.

Vanilla cupcakes with white and pink butter icing and glitter.

Vanilla cupcakes with white and pink butter icing and royal icing marbled pink butterflies.

Lemon cupcakes with lemon butter icing and a royal icing dove.

Vanilla cupcakes with white icing and red, white and blue royal icing roses.

Chocolate cupcakes with peanut butter butter-icing and grated chocolate.

Vanilla cupcakes with white icing, royal icing crowns (painted with gold lustre) and gold balls.

Lemon cupcakes with red, white and blue three toned lemon butter icing! 
Check out the Union Jack cupcake cases from Squire's Kitchen!

Lemon cupcakes with pink lemon butter icing and pink royal icing butterflies painted with glitter.


Sunday, April 22, 2012

Snack Jar

Snack jars! Isn't this a cute idea?


We went to Bristol for the day, and you know that you are bound to get hungry and not want to pay loads for some food, or not have the time to get any.
Nuts are a great snack, and they are healthy!
So I used one of my leftover sterilised jars from my chilli jam and filled it up with different nuts, dried fruit and chocolate! 

In mine I have 
- Pecan nuts
- Brazil nuts
- Hazelnuts
-  Walnuts
- Raisins
- Dark chocolate chunks (I had a bar of Cadbury's Bournville chocolate, and smashed it up with a rolling pin into chunks)

It will last a while, its sat in my car at the moment, so we can dip in and out of it whenever we want, and we don't have to worry about it going off.


What do you think? 
What will you put in yours?

Zoe x

Monday, April 9, 2012

Cookie Dough Brownies

Ben & Jerry's definitely got something right with their Half Baked ice cream. Cookie dough and brownie are so good together!

This recipe might seem a little scary because it has so many steps, but it is very easy!

Gooey in the middle!
Now I may have cheated slightly and made a brownie from a packet mix. Its so much quicker, easier, its probably cheaper and you know its going to work out well! I used Betty Crocker's Chocolate Fudge Brownie mix, because it honestly is the most amazing brownie I have ever had! I cooked mine for 30 minutes, rather than the suggested 35-40 minutes, so that it was still a bit gooey in the middle - the way a brownie should be! I only make it when I am at home in Dubai (I'm there now!), but I do make brownies from scratch when I am in Cardiff.


Brownie:
- 100g unsweetened dark chocolate
- 250g butter, melted
- 440g soft brown sugar
- 4 eggs
- 1 tbsp vanilla extract
- 125g all-purpose flour

1. Preheat the oven to 160 degrees. Use a brownie tin that is 22x33 centimeters (9x11 inches) and grease it. You can grease the tin with a bit of butter or vegetable oil, and spread it around with some kitchen paper.
2. Chop up the chocolate and melt it in a glass bowl in a microwave. Melt it in short 30 second bursts, so you don't burn the chocolate.
3. Stir the melted butter and sugar together.
4. Add the eggs, one at a time, and whisk them in. Add the vanilla extract.
5. Mix in the melted chocolate.
6. Next add the flour, and mix it until it is just combined. Lumps are good here.
7. Pour the batter into the tin and cook in the oven for 30 minutes. To test if it is cooked, use a toothpick and insert it into the middle of the brownie. You want it to come out clean. If it comes out with brownie batter on the end, cook it for a few more minutes. Remove from the oven and cool.


Cookie Dough:
- 170g butter
- 150g soft brown sugar
- 125g white sugar (use granulated sugar if you want more of a crunch, or caster sugar if you want it to be a bit smoother)
- 2 tsp vanilla extract
- 200g all-purpose flour
- 2 tbsp milk
- 140g chocolate chips, plus extra for sprinkling

1. Cream the butter.
2. Add the two sugars, vanilla extract and milk.
3. Carefully add the flour. You might want to test spreading a bit of the cookie dough onto the brownie, to make sure it sticks. Mine didn't at first, so I had to add milk to the recipe. If yours doesn't stick, add a little bit more milk.
4. Stir in the chocolate chips.
5. Spread the cookie dough over the cooled brownie. I didn't use all of the cookie dough, I thought I had enough on my brownies. I think I had a good cookie dough-to-brownie ratio!
6. Sprinkle chocolate chips over the top! You can even make a glaze to go over the top, by melting about 90g of chocolate chips with 1 tsp of butter, drizzle it over the top, then sprinkle the extra chocolate chips over the top.


Someone couldn't resist!
I think there are only a few pieces left now!
You can freeze the cookie dough brownie pieces for up to 3 months in the freezer if you can't eat it all in one go.


Zoe x
Related Posts Plugin for WordPress, Blogger...