Showing posts with label cake. Show all posts

Friday, January 10, 2014

Giant Flowery Cupcake

I have been holding off on posting this for a while, because I wanted my sister to write the post, seeing as it was her who made the cake! But she decided to be a bit shy and she also has quite a lot on as she has just started uni!


Isn't this a pretty cake?

My sister was thrilled when I gave her this giant cupcake cake mould! Of course she had to make a cake as soon as she got it!!
You can buy them here. I recommend getting a silicone one, they hold their shape and its super easy to get the cakes out. I've heard that it is really hard to get the cakes out of the hard metal tins. Just be careful not to bend the cake too much when you are getting them out or they may break!


We used a generic cake recipe to make this cake. You can use this one here for a vanilla cake, and add additional flavours to this mix, if desired.


Some people obviously couldn't resist long enough for me to take my photos!!

Hope you enjoyed this - and leave some comments! My sister would love to know what you think :)

Zoe x

Sunday, November 10, 2013

No Bake White Chocolate Cheesecake

This is a really delicious white chocolate cheesecake, that we were serving at the pub I work in.
It was only meant to be on for a week, but stayed on for about 6 weeks.

This cheesecake is very rich, but light and fluffy.


Biscuit base
- 300g biscuits (I used half Digestive, half chocolate chip cookies)
- 80g butter, melted

Filling
- 375g double cream
- 750g cream cheese
- vanilla extract/flavouring (not essential)
- 500g white chocolate (Plus extra to drizzle on top!)
(I know it gets expensive, but I would recommend using a more upmarket, nice tasting white chocolate!)

1. Break the biscuits into crumbs. I did this in a food processor, but you can put them in a ziploc bag and bash them with a rolling pin.
2. Add the melted butter, and mix.
3. Squash the breadcrumbs into a cake tin until it is very compact. Put it in the fridge to cool.
4. Break the white chocolate up and melt it in the microwave (in small bursts) or over a double boiler. When it has melted, leave it to cool on the counter.
5. Whip the double cream in a large bowl.
6. Mix the cream cheese and vanilla (1tsp-1tbsp depending on how you like the taste) into the cream.
7. Add a large spoonful of the cream cheese mixture into the cooled but melted white chocolate, give it a mix, then add all of the white chocolate into the cream cheese.
8. When it is all evenly mixed, pour the filling over the biscuit base and smooth it over at the top.
9. Leave to cool in the fridge for about an hour, then melt the extra white chocolate and drizzle it over the top. Put back in the fridge and cool for a further 2 hours. This cheesecake needs to be cooled for 3 hours in total.

Enjoy!

Saturday, February 9, 2013

Carrot Cupcakes


Carrot cake is lovely. When we lived in Dubai, we would go for lunch at a cafe called The Lime Tree Cafe, and we could never go there without ordering a piece of carrot cake, either to eat there or take home. It was a good day when there were 3 boxes in the fridge with slices of carrot cake in!
So after not seeing any carrot cupcakes around, I decided to make some of my own :)
These were yummy cupcakes, but I messed up the icing, so I haven't put pictures of the iced cakes up.


Recipe:
Cupcake:
- 175g light brown sugar
- 150ml vegetable oil
- 2 large eggs
- 200g self-raising flour
- 2 tsp cinnamon
- 1 tsp vanilla extract
- Zest of 1 orange

Icing:
- 300g full fat cream cheese
- 50g icing sugar

1. Preheat the oven to 180 degrees. Line a muffin tray with 12 cupcake cases.
2. Add all of the ingredients into a bowl and mix together. 
3. Spoon the mix into the cases, and bake in the oven for 20-25 minutes.
4. While the cakes are in the oven, mix the cream cheese and icing sugar together. I decided to beat mine in a mixer, then it went really runny, so just gently mix it in a bowl by hand. 
5. When the cakes have cooled, decorate with the icing.


Okay, here is a little picture of the cakes with icing and a sprinkling of glitter. I don't think the glitter made the cakes look any better unfortunately!


Zoe x

Thursday, February 7, 2013

Fuzzy Navel Cupcakes


I love sweet cocktails. They don't taste of alcohol so they go down very easily. 
Fuzzy Navel, orange and peach, in cupcake form! They have quite a boozy hit to them.

Makes 18 cupcakes

Recipe:
- 110g butter
- 225g sugar
- 2 eggs
- 60ml peach schnapps
- 50ml orange juice
- 200g self raising flour
- 75g plain flour

Icing:
- 60g butter
- 500g icing sugar
- 40ml peach schnapps
- 20ml orange juice


1. Preheat the oven to 180 degrees. Line two muffin trays with 18 cupcake cases.
2. Cream the butter for as long as you can with a fork, or an electric whisk.
3. Add the sugar, mix.
4. Beat in the eggs one at a time. Add the orange juice and peach schnapps.
5. Sift in the flour in and mix again.
6. Put a tablespoon of batter into each cupcake case. 
7. Bake in the oven for 15 minutes.
8. While the cakes are cooling, start to make the icing. Cream the butter until it is pale and fluffy. 
9. Carefully stir in the icing sugar. The icing will be very thick. Then add the peach schnapps and  orange juice.
10. When your cakes are cooled, decorate them with the icing, either piping it on, using a palate knife or a regular knife! 
11. To decorate the cupcakes I added glitter cherries and flying saucers (retro treat for a retro cocktail).


I hope you enjoy them! 

Thursday, January 24, 2013

Strawberry Margarita Cupcakes


A recent phenomenon in the world of cupcakes is cuptails! Or caketails. Basically, cocktail flavoured cupcakes. I love cupcakes and I love cocktails! Perfect match :)

There have been a few big birthdays recently! These strawberry margarita cupcakes were for Rachel's 21st. She works in a cocktail bar and started birthday celebrations with a cocktail, so I thought it was the perfect idea!
I really struggled to find a recipe that didn't use actual rum. I had bought rum flavouring, as I don't drink rum, so buying a whole bottle would be a waste. Next time I might use real rum as the flavouring wasn't quite right and smelled quite orangey. I also wanted to use canned strawberries because they are out of season at the moment, so the fresh ones are very expensive! I spent ages looking and in the end I decided that I should just kind of follow a recipe, making my own alterations as I went.


Recipe:
Cupcake:
- 175g butter
- 175g caster sugar
- Finely grated zest of 1 lime
- Juice of 1/2 a lime
- 1 tsp rum flavouring (or 2 tbsp rum)
- 3 large eggs
- 175g strawberries (if canned, then drain and chop them, if fresh, then hull and chop them)
- 280g self-raising flour

Icing:
- 500g icing sugar
- 60g butter
- 60g strawberries (if canned, then drain and chop them, if fresh, then hull and chop them)
- Zest of 1 lime
- Juice of 1/2 a lime (you can add extra at the end as long as it doesn't ruin the consistency!
- 1 tsp rum flavouring (or 2 tbsp rum and add extra icing sugar until you get the desired consistency)

Decorations:
- pink/red and green neon sugar (for the sugar rim)
- Lime, quartered and sliced

Before making the cakes and icing, everything should be at room temperature.
The recipe says it makes 15 cupcakes, but I managed to make 22!


1. Preheat the oven to 180 degrees. Line 2 muffin trays with cupcake cases, or bake one tray and reuse it.
2. Cream the butter for as long as you can. 
3. Add the sugar, lime zest, lime juice and rum flavouring, mix.
4. Beat in the eggs one at a time.
5. Sift in the flour in and mix again.
6. Put a heaped tablespoon of batter into each cupcake case. 
7. Bake in the oven for about 20 minutes.
8. While the cakes are cooling, start to make the icing. Cream the butter until it is pale and fluffy. 
9. Add the icing sugar, strawberries, lime zest, lime juice and rum flavouring. Mix it together s-l-o-w-l-y at first so that icing sugar doesn't fly everywhere!!
10. Pipe the icing onto the cakes.
11. Sprinkle the coloured sugar onto a plate, and roll the edges of the iced cupcakes in the sugar, to create a sugar rim. Put a piece of lime in the side. You can also cut up strawberry pencils and use them as a 'straw'.

These are all of Rachel's cakes!


Zoe x

Saturday, December 1, 2012

Christmas Cupcakes

It's officially December. This means Christmas.
Christmas is my favourite time of year.
I LOVE CHRISTMAS!!
Did I make that clear?

I have some good things to look forward to this month! Handing all my work in, finishing university for the Christmas break, my sister's birthday and of course, Christmas and Boxing Day where I get to see family and I'll be helping my Mum make Christmas dinner!
Best of all though, I'm going to Paris for 3 nights with my lovely boyfriend :) It was his 21st birthday present from me. I cannot wait!


My sisters and I did a cupcake decorating class 2 weeks ago with Teach Me Sugarcraft. We didn't realise that it was a Christmas theme. 
I don't think it was worth the £70 that the course normally costs! We only paid £10 each as there was a deal on KGB Deals. There were 10 of us squashed around a table in a leisure centre and we only had 3 of each thing on the table, which meant you had to wait and I felt like they rushed us. They had already made the cakes and icing, we just had to pipe, roll, cut and stick.
I think that we could have easily copied the designs from seeing a picture from the internet, we didn't really need to be 'taught', as everyone had basic decorating knowledge.
Ahh well, it was good anyway. Their icing tasted nice.


What do you think?

Zoe x

Tuesday, October 23, 2012

Raspberry, White Chocolate and Vanilla Cupcakes


These cupcakes were really nice, and very easy to do!
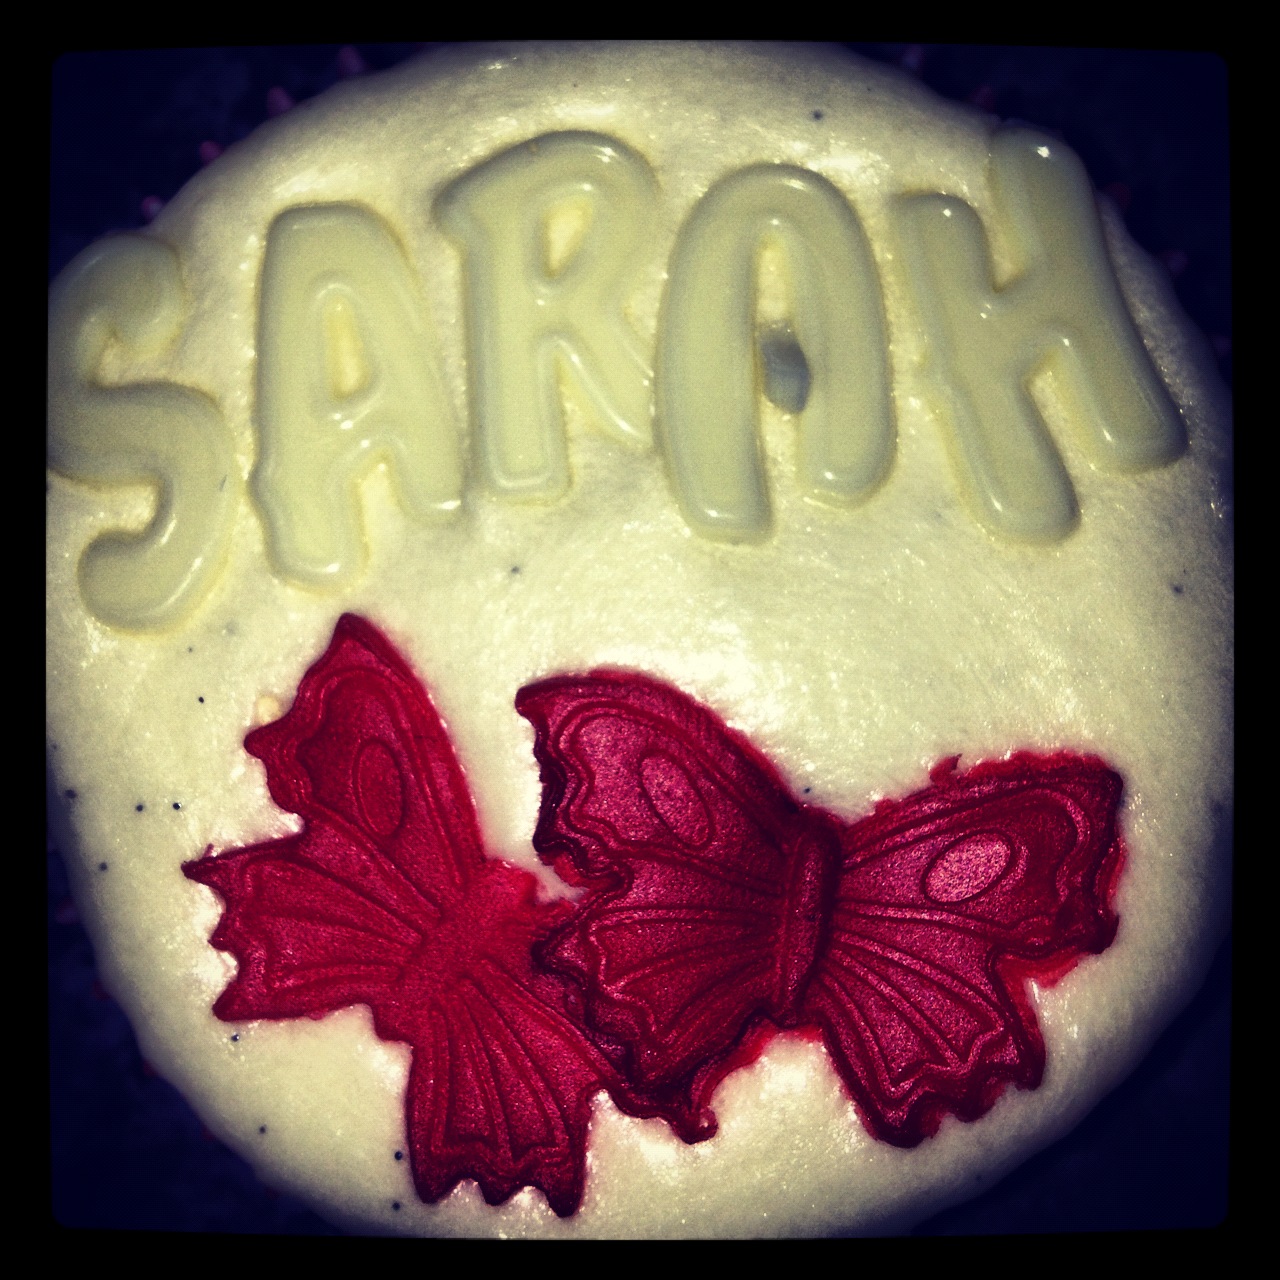
The nicest touch to these was that they had everyone's names on, in white chocolate letters :)
I also added some red butterflies for a bit of contrast, and to match the red cases that the cupcakes were in. You can get the cutters here. 

Recipe:
Cupcake
- 125g butter
- 125g caster sugar
- 2 tbsp raspberry jam
- 2 eggs
- 150g self-raising flour (or 150g all-purpose flour plus 1 tsp baking powder)
- 12 fresh raspberries

Icing
- 75g butter
- 125g icing sugar
- 1 tsp vanilla extract

1. Preheat the oven to 180 degrees. Line a muffin tray with 12 cupcake cases.
2. Cream the butter for as long as you can, meaning mix it with a fork or a whisk, until it is pale and fluffy.
3. Add the sugar, mix. Then add the raspberry jam and mix
4. Beat in the eggs one at a time.
5. Sift in the flour in and mix again.
6. Half fill the cupcake cases, then put a raspberry into the middle of each case, then pour more cupcake mix over the raspberries until the cases are about 2/3 - 3/4 full.
7. Bake in the oven for 12-15 minutes.
8. While the cakes are cooling, start to make the icing. Cream the butter until it is pale and fluffy. 
9. Carefully stir in the icing sugar and vanilla extract. 
10. When your cakes are cooled, decorate them with the icing, either piping it on, using a palate knife or a regular knife! I then added the names and the butterflies.


Zoe x


Saturday, August 4, 2012

Coconut and Lime Cupcakes


We used to make a coconut and lime cake with a lemon-lime syrup when we were younger, and it was my favourite kind of cake. The syrup adds extra bursts of flavour. 
I haven't made it at all since being at university, so this summer I bought a bag of dessicated coconut so that I could make it. 
Then I thought 'what about turning it into cupcakes?' and ta dah! The coconut-lime cupcakes with a lemon-lime syrup and lemon butter icing were made. 

I split my cupcake mixture into two, one half had coconut, and the other didn't. I definitely preferred them with the coconut, but I also had to cater for the fussy people!

Recipe:
Cupcake
- 125g butter
- 125g caster sugar
- Zest of half a lime
- 2 eggs
- 150g self-raising flour (or 150g all-purpose flour plus 1 tsp baking powder)
- 60g dessicated sweetened coconut (Can be left out if you don't like coconut)

Syrup
- Zest of half a lime
- Juice of two limes (make the icing before you make the syrup)
- 4 tbsp lemon juice
- 100g caster sugar

Icing
- 75g butter
- 125g icing sugar
- Zest of 3/4 a lime

Lime Zest Curls
- 1/4 lime zest, peeled and chopped into thin strips (see pictures)
- 2 tbsp caster sugar, sprinkled onto a plate

1. Preheat the oven to 180 degrees. Line a muffin tray with 12 cupcake cases.
2. Cream the butter for as long as you can with a fork, or an electric whisk.
3. Add the sugar and lime zest, mix.
4. Beat in the eggs one at a time.
5. Sift in the flour in and mix again. Stir in the coconut.
6. Put a tablespoon of batter into each cupcake case. There should be enough for about 13 cupcakes, or 12 and some batter for you to lick up!
7. Bake in the oven for 12-15 minutes.

8. While the cakes are cooling, start to make the icing. Cream the butter until it is pale and fluffy, either with a fork or an electric whisk. 
9. Add the icing sugar and lime zest. Mix it together s-l-o-w-l-y at first so that icing sugar doesn't fly everywhere!!

10. Cut the lime into super thin strips like the picture below.

11. Make up the syrup with the sugar, lime zest, lime juice and lemon juice. Heat it in a saucepan gently, until the sugar is dissolved. Add the lime strips. Boil the syrup for 5 minutes, or until it has thickened. Remember it will thicken more when it cools.

12. Remove the lime strips from the syrup and roll them in sugar that is sprinkled over the plate.

13. Poke holes into the top of the cupcakes with a cocktail stick. Carefully spoon the syrup onto each cupcake. You can add another spoonful of syrup onto it when the previous spoonful of syrup has soaked in.

14. When your cakes and syrup are cooled, decorate them with the icing, either piping it on or spread it on with a knife!

Let me know if you make these, and what you think of them!

Zoe x

Thursday, July 26, 2012

Chocolate and Pear Cake


There are days when you need something sweet, and we thought this was perfect when we didn't have much in the house. This mainly uses products that you will have in your cupboard and fridge.

Ingredients:
- 2 cans pear halves in juice
- 190g plain flour
- 40g cocoa powder
- 190g caster sugar
- 225g butter, plus extra for greasing
- 1 1/2 tsp baking powder
- 1/2 tsp bicarbonate of soda
- 3 eggs
- 3 teaspoons vanilla extract

Recipe:

1. Heat the oven to 200 degrees.
2. Drain the cans of pears and lay them, flat side down, on the bottom of the dish.


3. Put all of the ingredients into a bowl.


4. Mix together! 
This is honestly one of the most amazing tasting chocolate cake batters ever!!


5. Pour the chocolate batter over the pears and spread it out, its okay if some of the pear is poking out! 6. Bake in the oven for 25 minutes, then leave to cool.
7. Serve with ice cream, or a chocolate sauce! It would be great with my chocolate peanut sauce (do pears and peanuts go? Only one way to find out!)

Let me know how it turns out of you try it, and if you do, send a photo on twitter or facebook!

Zoe x

Tuesday, July 3, 2012

Chocolate Brownie Cupcakes with Caramel Sauce


I decided to make these for my housemate's 20th birthday, as my other housemate had made cupcakes for him. These definitely went down a treat and everyone loved them, especially when they found a chunk of chocolate in them!


- 160g of butter
- 500g caster sugar
- 4 eggs
- 1 tsp vanilla extract
- 125g self-raising flour
- 175g cocoa powder
- Bar of chocolate or chocolate chips (optional)

1. Preheat the oven to 180 degrees. Line a muffin tray with cupcake liners.
2. Melt the butter in the microwave, in short 30 second bursts (you don't want it to burn!)
3. Add the sugar, the eggs and vanilla extract, then whisk.
4. Sift the flour and cocoa powder in and mix.
5. Break up the bar of chocolate. I like to break it into squares, then put them a sandwich bag and whack them with a rolling pin until they are in little pieces. Then mix them into the brownie batter.
6. Spoon the batter into the cupcake liners, so that they are 2/3 full.
7. Cook them in the oven for 20-25 minutes. You want the insides to be all fudgey and the outside to be crispy.

When they are done in the oven, leave them to cool and then top them with my easy caramel sauce.
You could then grate some chocolate over them as a nice finishing touch!


Zoe x

Monday, June 11, 2012

Squire's Cake Shop

My aunt has a fantastic cake shop near her house in Farnham, Surrey. They have everything you will need to make and decorate a cake! These are pictures of some of the cakes that they had on display when I went in there (09.06.2012).

Jubilee Cake

Animal print cupcakes

Union Jack cake

Garden cake

Handbag cake.

Squire's Kitchen's website is

Zoe x

Monday, May 7, 2012

Lemon Cheesecake with Berries

These cheesecakes are really yummy and easy! Plus you can have fun deciding how to layer and decorate them!

Recipe:
For the base:
- 8 digestive biscuits
- 90g caster sugar

For the cheesecake:
- 400g cream cheese
- 90g icing sugar
- Zest of 1/2 a lemon
- Juice of 1/2 a lemon
- 600ml double cream

For the topping:
- Mixed berries (frozen or fresh)
- Caster sugar
- Creme de cassis (blackberry liqueur)
- Lemon juice

1. Break up the digestive biscuits. I put them in a sandwich bag and bash them with a rolling pin.
2. Heat the sugar in a pan over a medium heat. Do not stir it with a spoon or any other utensil, just swirl it around in the pan. 

3. When it has all caramelised, like in the picture above, add the broken up biscuits and stir, like the picture below.


4. Leave this mixture to cool and harden on a plate in the fridge. When you take them out of the fridge to serve them, you might need to break them up again with a rolling pin!


5. Whip the cream, until it is thick and can hold a soft peak when you lift the whisk out.
6. In a separate bowl, mix the cream cheese, icing sugar, lemon zest and lemon juice together. 
7. Mix a large spoonful of the whipped cream into the cream cheese mixture, then carefully mix the rest of the rest of the cream. You want to do it carefully so that you don't knock lots of air out of your whipped cream.


The first way that I decorated them was with fresh berries (or frozen berries) and a berry sauce. Heat some lemon juice, creme de cassis and caster sugar in a saucepan, bring it to the boil, then turn the heat down and thicken the sauce up for a few minutes, then leave it to cool. Remember that the sauce will thicken up even more when it has cooled. The berries that I used were frozen, so I defrosted them in the microwave and left them to cool.
To layer it up, spoon caramelised biscuits into the bottom of whatever you are serving it in, I chose margarita glasses, then put the cream cheese mixture on top, followed by the berries, drizzle with some of the sauce and top with more of the caramelised biscuit crumbs.


Or the second way that I decorated them was with a berry compote. Put some frozen mixed berries into a saucepan with some sugar, lemon juice and creme de cassis, heat them up until the berries go from this....

...to this! The berries should have broken down and the sauce should have thickened up.

I spooned the caramelised biscuit crumbs into the bottom of the glass, then the cream cheese mixture, then the berry compote. I topped it with a few slices of fresh strawberries.


Zoe x


Related Posts Plugin for WordPress, Blogger...